4.2. Howdy Core GUIs
These are the Howdy core GUIs.
howdy_config_gui is the configuration tool used to get the full Howdy functionality.
howdy_core_gui is a more archaic version of
howdy_config_gui. This only provides a GUI to set up the correct Plex server settings or to set up Google OAuth2 authentication.
4.2.1. 
howdy_core_gui
howdy_core_gui has two modes of operation: either return the Plex server token and URL; or set up Google OAuth2 authentication. howdy_core_gui -h produces this help screen,
Usage: howdy_core_gui [-h] [--info] [--remote] {googleauth} ...

positional arguments:
  {googleauth}  Can optionally choose to set up google oauth2 authentication.
    googleauth  Set up google oauth2 authentication.

optional arguments:
  -h, --help    show this help message and exit
  --info        If chosen, run in INFO logging mode.
  --remote      If chosen, do not check localhost for running plex server.
At the top level, here are the options.
--info: print out theINFOlevelloggingoutput.--remote: If chosen, do not check localhost for a running Plex server.
When running in standard mode, this tool prints out the current Plex server and token URL.
tanim-desktop $ howdy_core_gui
token = XXXXXXXXXXXXXXXXXXXX
url = http://localhost:32400
I mask the 20-character token with XXXXXXXXXXXXXXXXXXXX for privacy reasons.
When running with googleauth, this GUI pulls up a Google OAuth2 authentication dialog window if we either choose to bypass any existing authentication, or if that authentication does not exist. Running howdy_core_gui googleauth -h produces this help screen,
usage: howdy_core_gui googleauth [-h] [--bypass]

optional arguments:
  -h, --help  show this help message and exit
  --bypass    If chosen, then ignore any existing google oauth2 authentication
              credentials.
The --bypass flag ignores any existing Google OAuth2 authentication.
This GUI is launched when running howdy_core_gui googleauth.
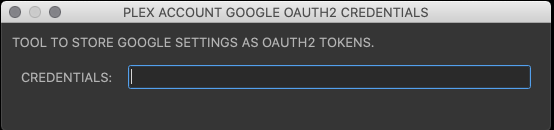
Fig. 4.1 Fill out the Google OAuth2 authentication credentials in the text box in the same manner as done in Fig. 2.12 in Section 2.1.6 for howdy_config_gui.
Here, a browser tab or new window is launched (see Fig. 2.11).
You will see a scary dialog window in the browser window (see Fig. 2.13).
Click on the Allow button for the six Google services that Howdy requires (see Fig. 2.14).
The final browser window shows a text box with the Google OAuth2 authentication token string (see Fig. 2.15). Copy that string into the GUI dialog widget in Fig. 4.1, and press return on the text box in this dialog window.
If all goes well, then all the Google services needed by Howdy will have been authorized.